
Install a Septic System Solution
Typical Installations Can Be Performed In 30 Minutes!
Watch The Video To See How Easy The Installation Process Is!
This video is a high-level description on how the Remediator® is installed. Please always follow the illustrated installation guide that is shipped with the product. Each installation guide will include specific instructions regarding the assembly process to help you to become familiar with your septic system, and Aero-Stream® components.
If you have any questions, you can call our FREE technical support line at (877) 254-7093.
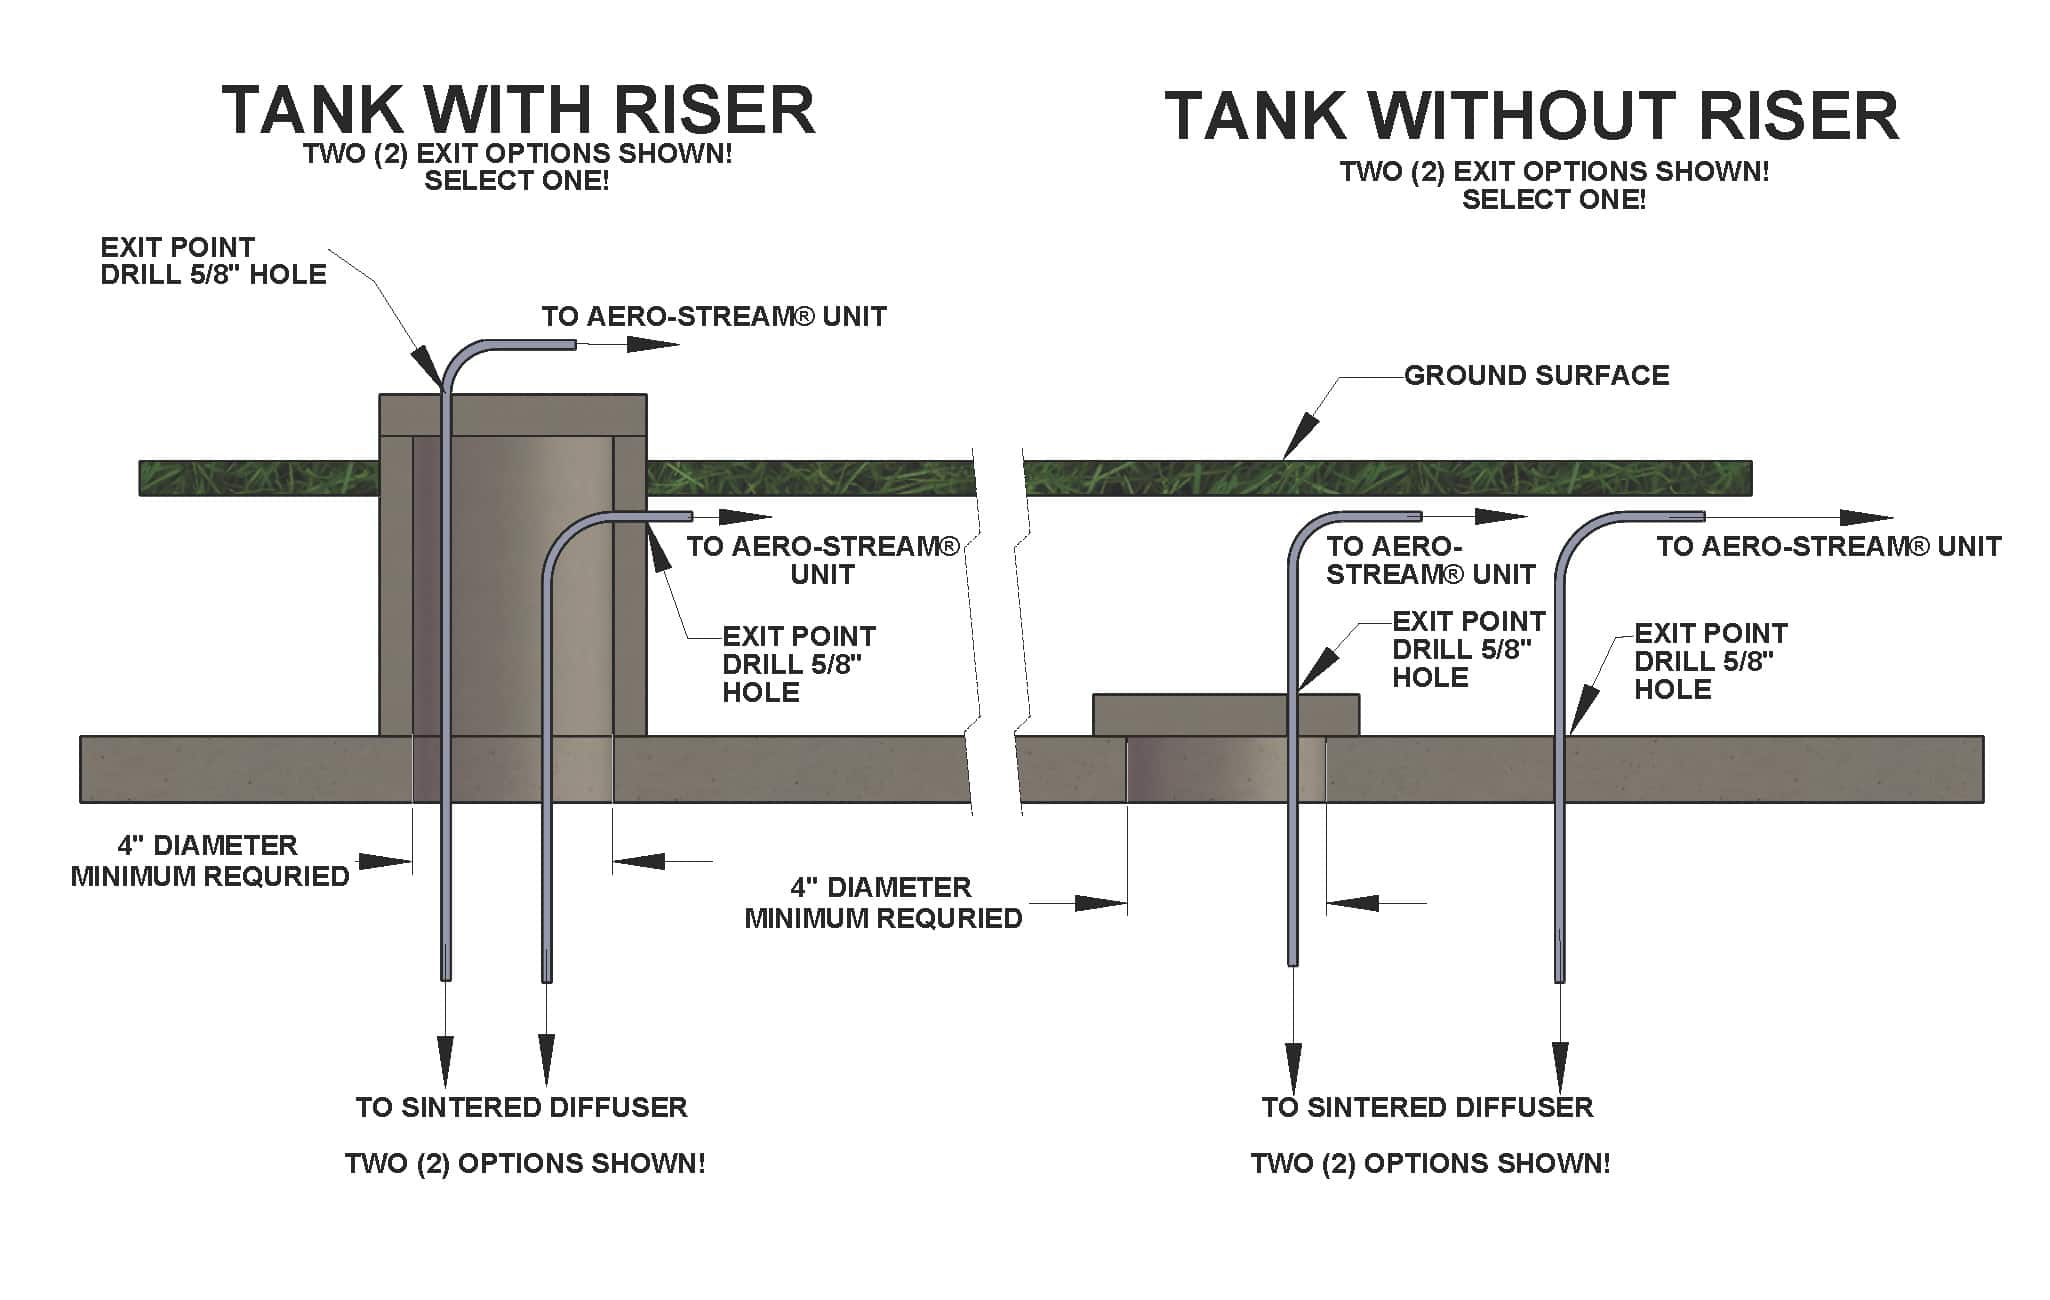
1. Drill a 5/8″ hole through the clean-out cover of the septic tank.
2. Lower the sintered air diffuser(s), air line, floats and Bio-Brushes™ into the septic tank. Feed the “free” end of the air line from the bottom side of the clean-out cover through the 5/8″ drilled hole and pull the excess air line through the hole.
3. Lay the air line out on the ground along a path towards the nearest 120 volt grounded electrical outlet.
4. Place the Aero-Stream® unit on the ground near the 120 volt electrical outlet. The Aero-Stream® unit is a UL Listed outdoor appliance and is designed to operate in all weather conditions.
5. Connect the air line to the Aero-Stream® unit and plug the power cord into the 120 volt grounded electrical outlet.
Click Images to Expand
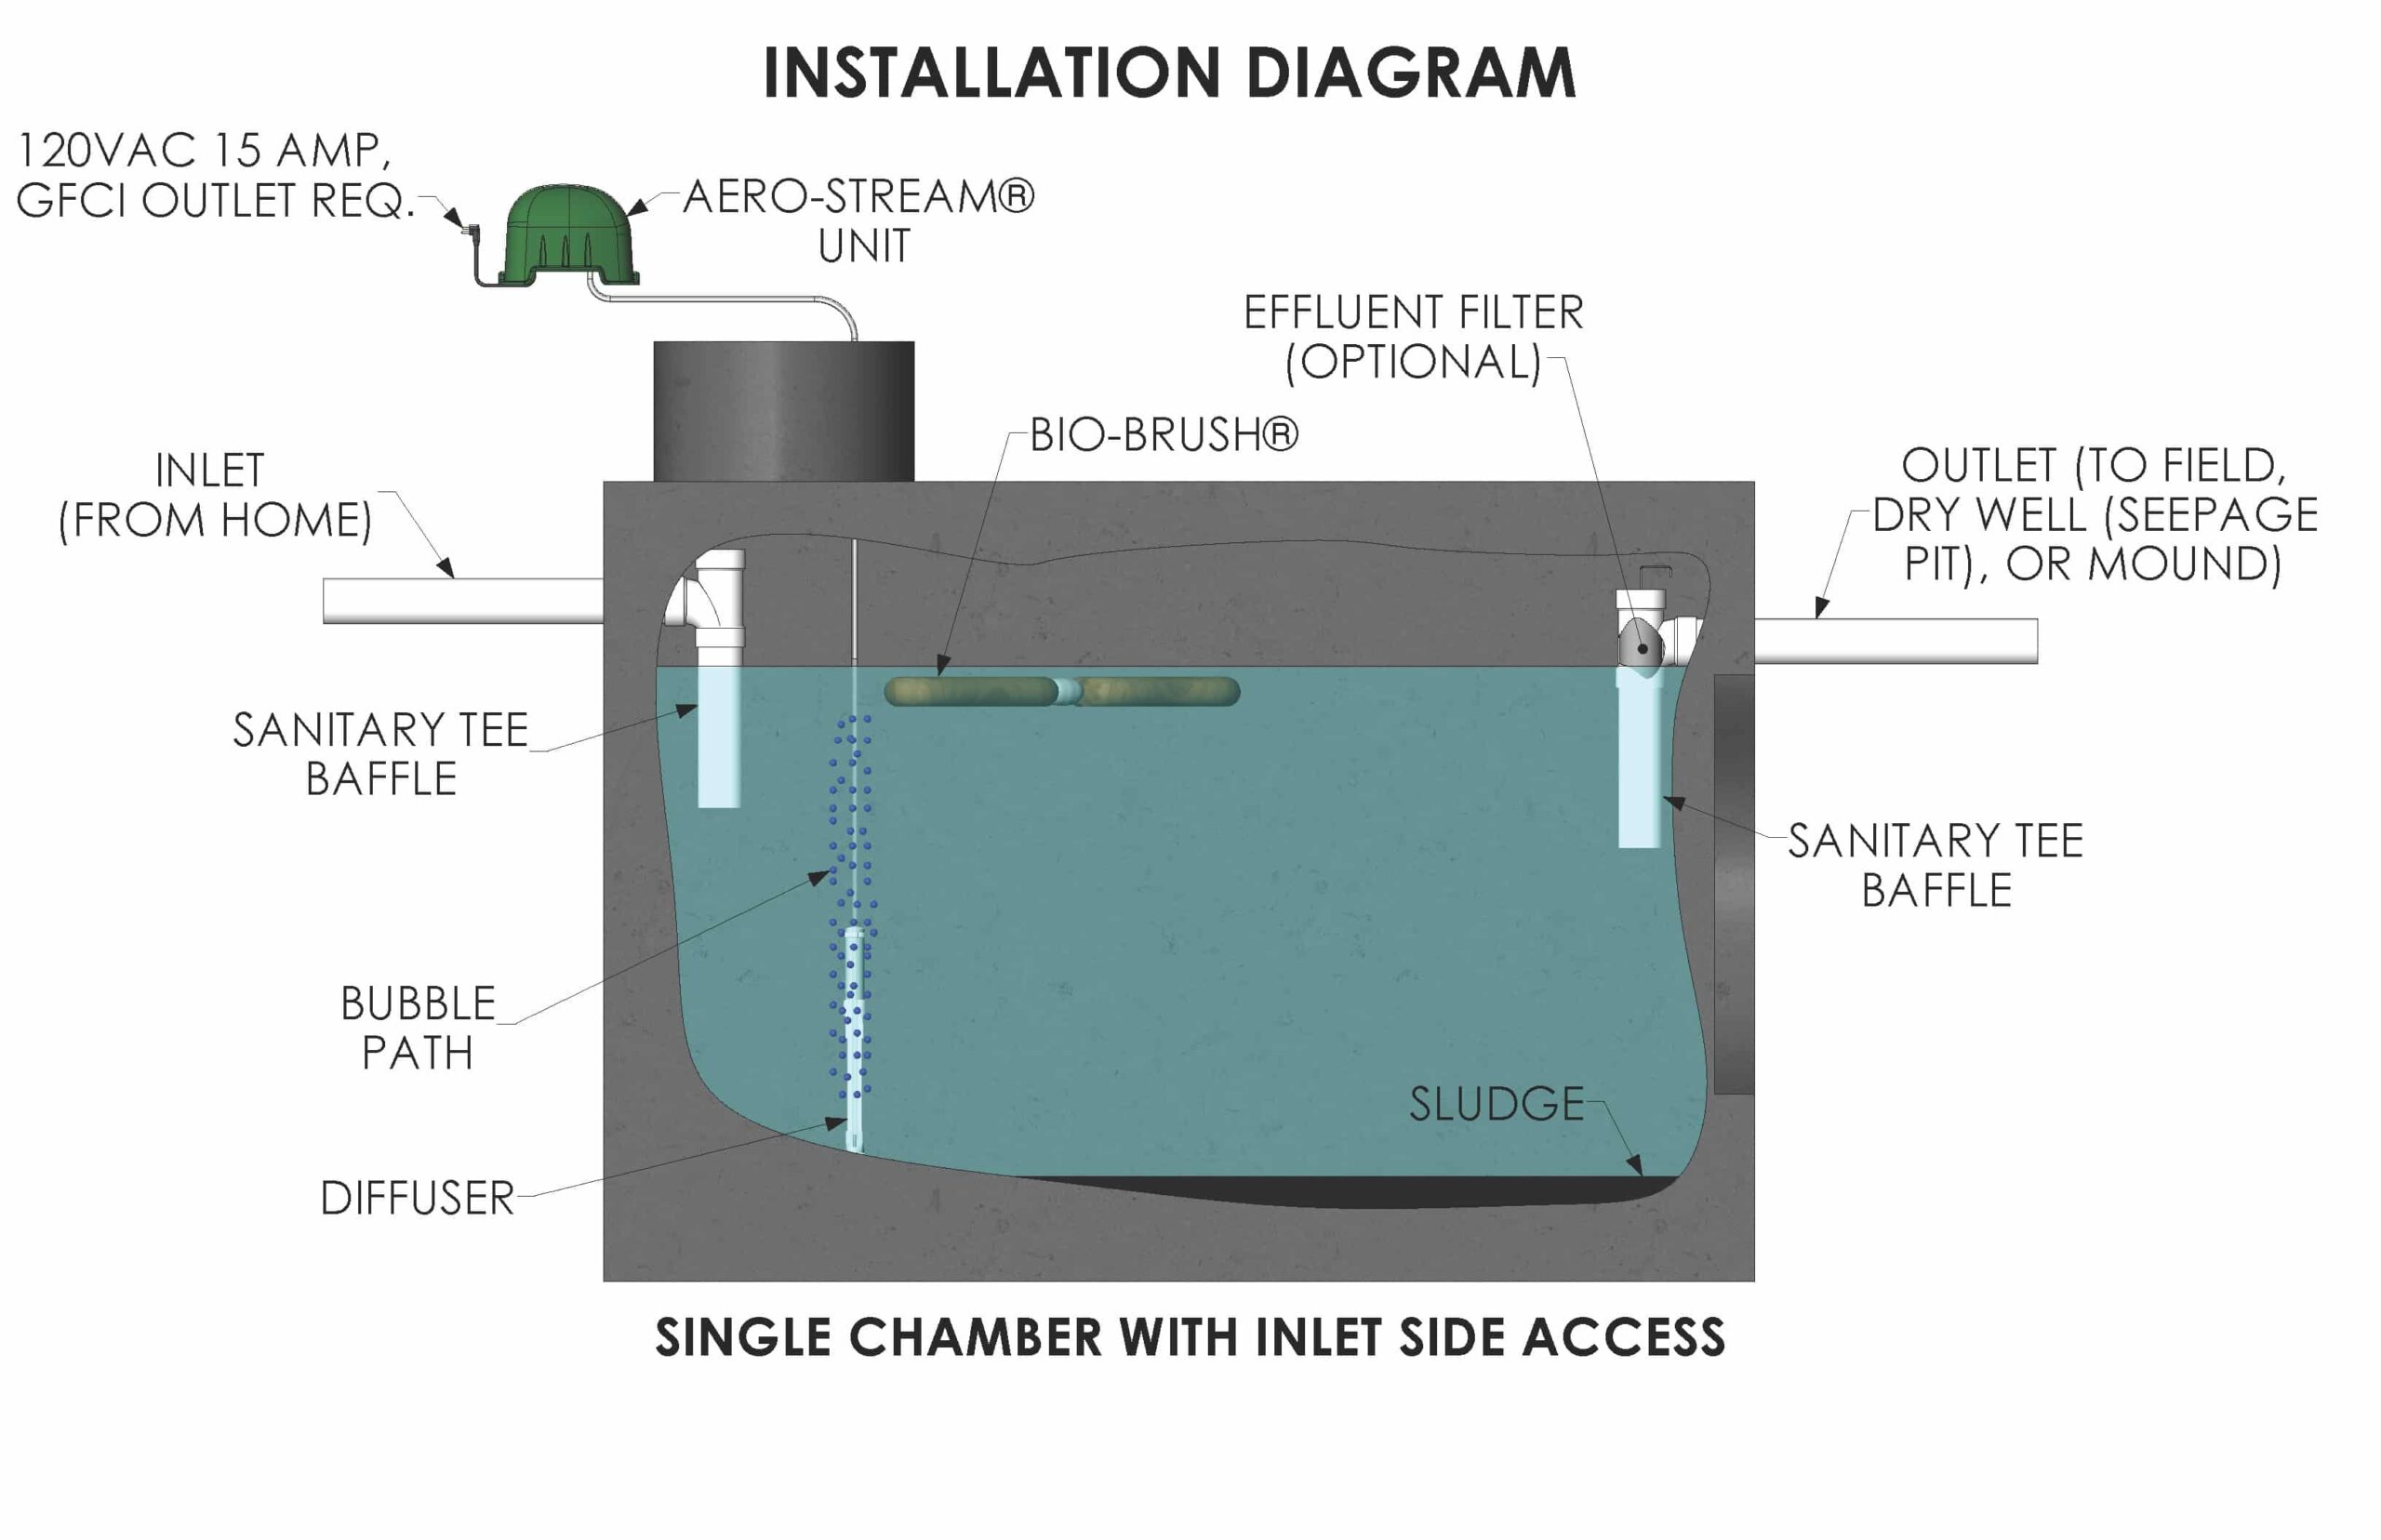
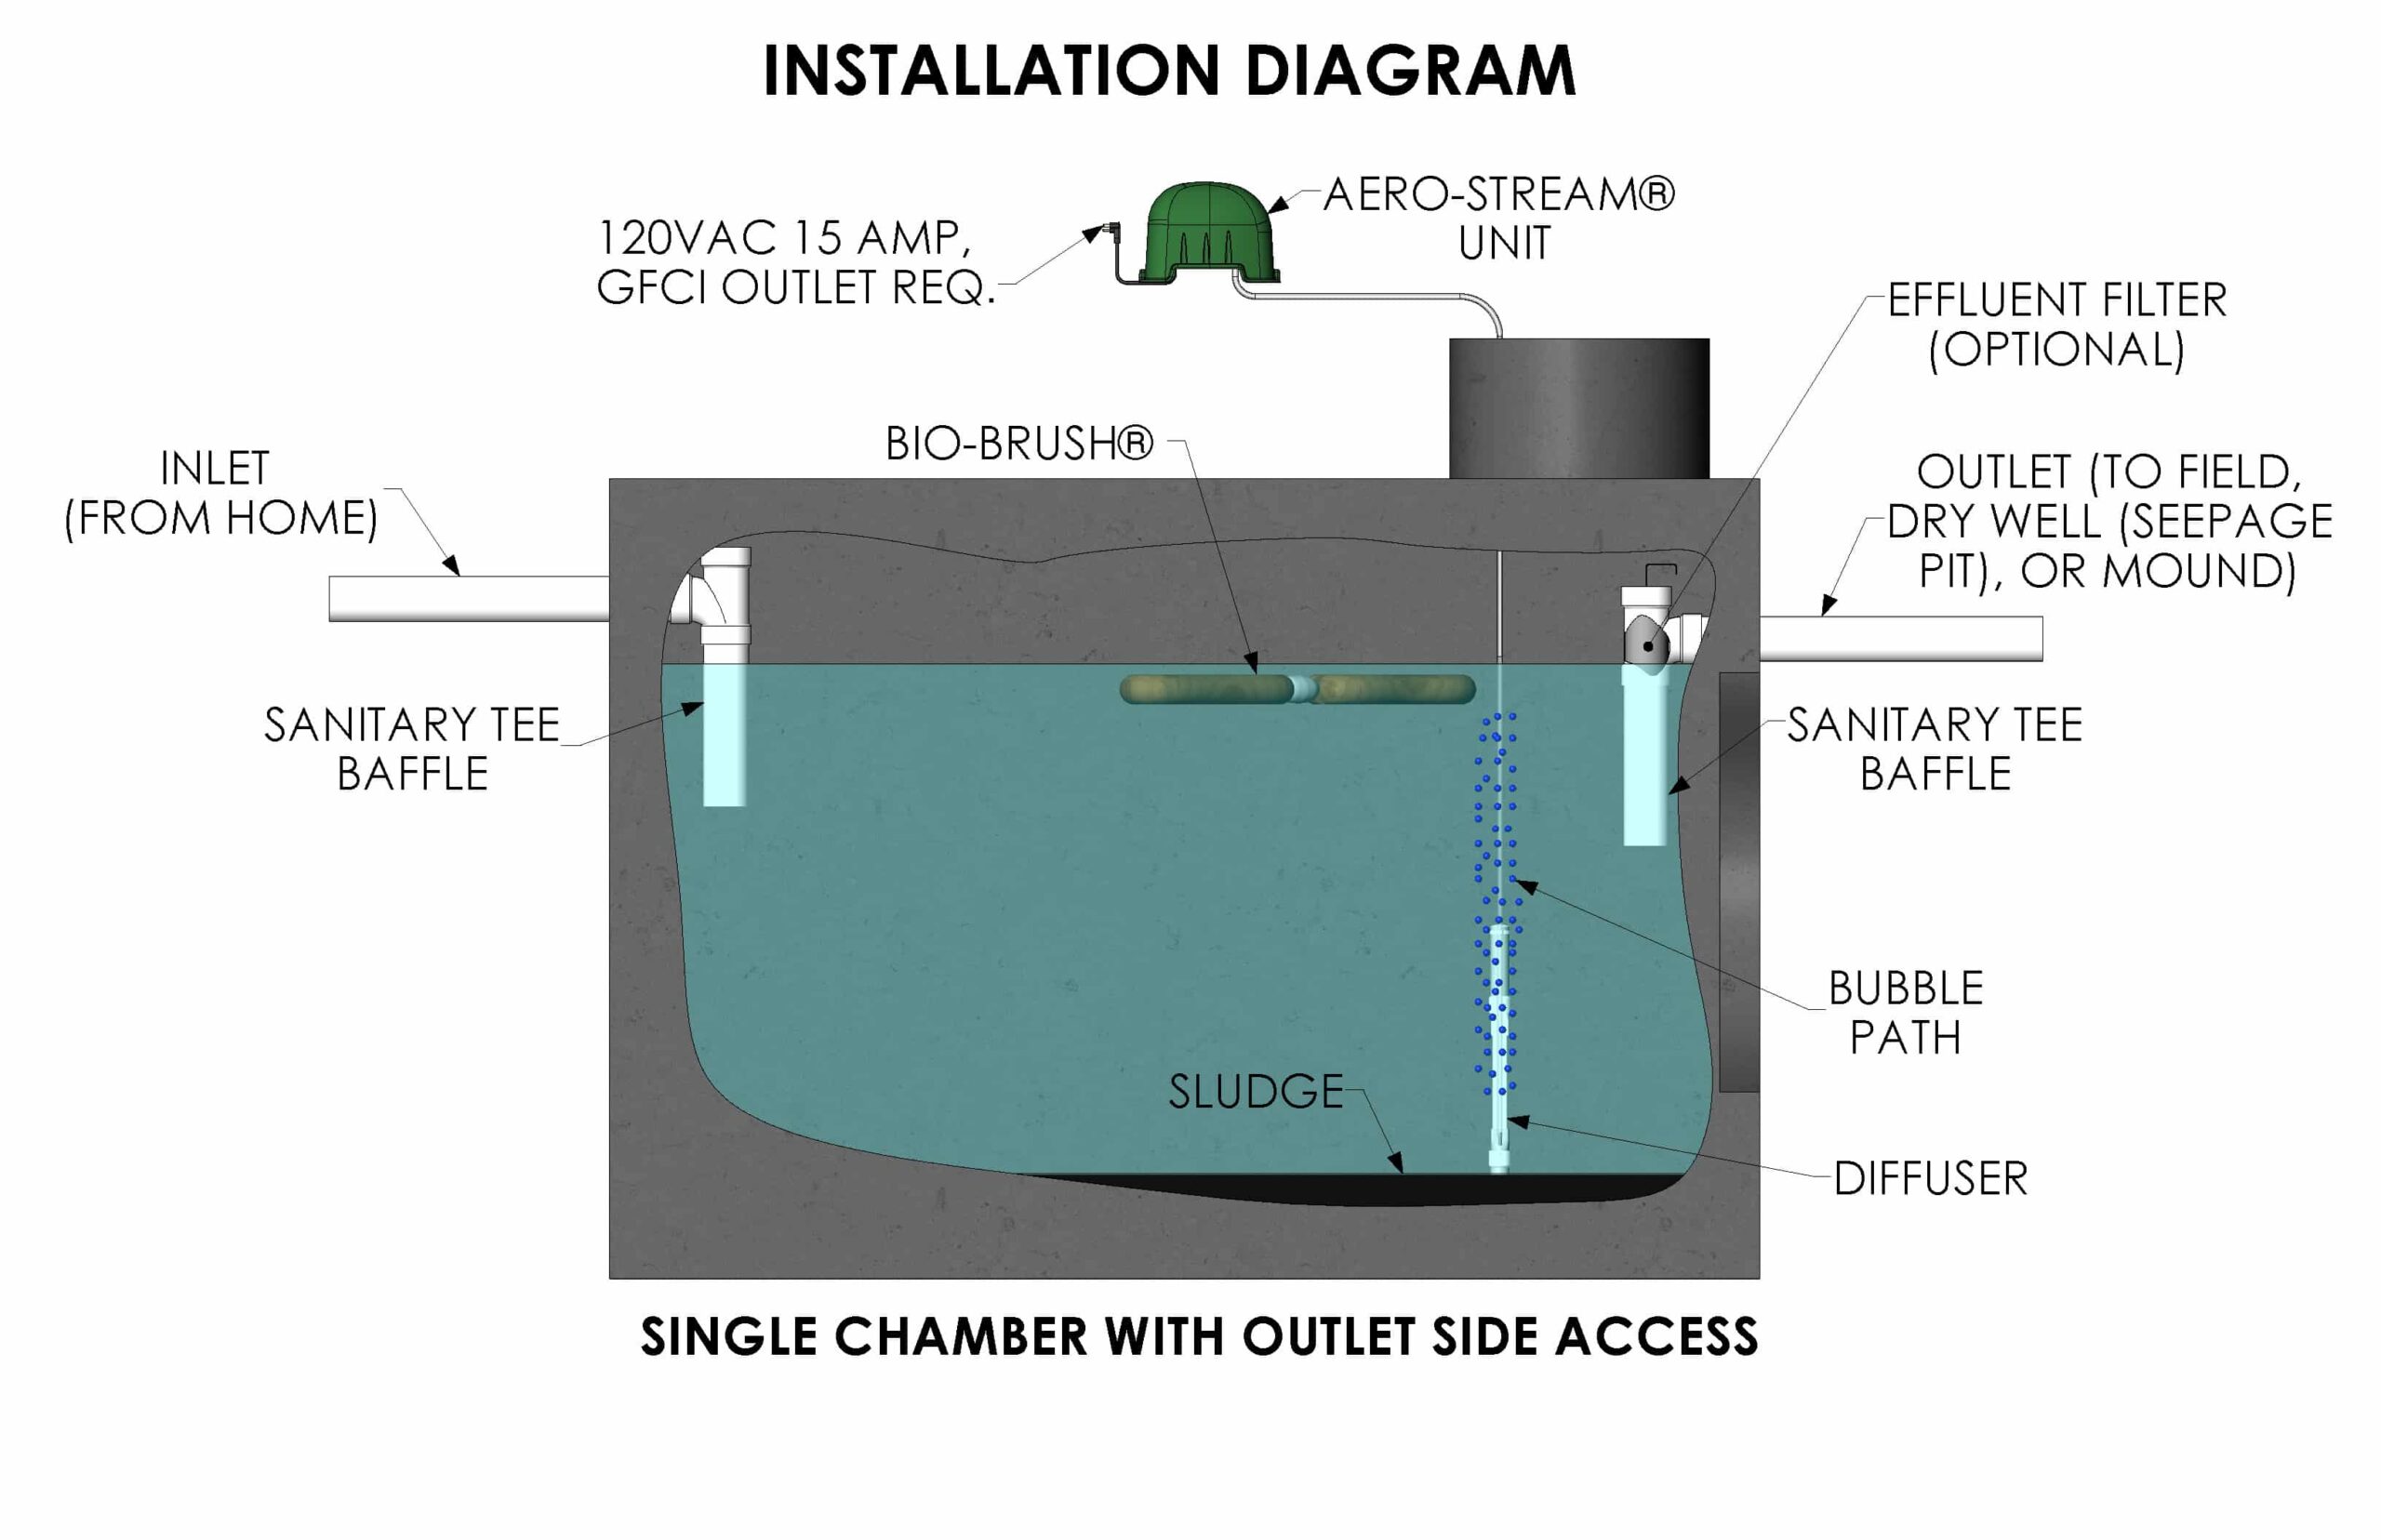

The conversion process is now underway! The airline can be buried 2 to 3 inches underground to avoid becoming a maintenance nuisance. The Aero-Stream® equipment immediately begins converting the septic tank and system from an anaerobic to an aerobic environment. Within hours, the aerobic bacteria in the septic tank starts breaking down the septic sewage significantly faster and more efficiently than the anaerobic bacteria. Within weeks, noticeable improvements will be observed in the septic system. Your septic system problems will be well on the way to being resolved!